Finally, I Can Eat Ice Cream… Or Can I?

I love ice cream. Who doesn’t? But seriously, I LOVE it. Triple chocolate ice cream with ooey, gooey chocolate fudge in chocolate ice cream with bits of dark chocolate. Urrrgghhh (pretend this is Homer’s drooling sound). Imagine my surprise when I got my food intolerance test results back and the food item to which I am most (and severely) intolerant is… Cow’s milk. WHAT??? Are you kidding me?

I don’t drink milk. I don’t particularly like the taste of it. Creme however, is a different story: Creme in my coffee, cream with my raspberries, cream with strawberries, cream with blueberries, and the best… iced cream. When I found out I had to cut out cow’s milk products for a minimum of three months, I had to get creative. I discovered I love coconut milk (a good quality kind from a can, not the prepared beverage). I especially like it as a replacement to cream in my mocha coffee (heat it up, mix it with cocoa and agave nectar and add coffee). Anyway, back to ice cream…

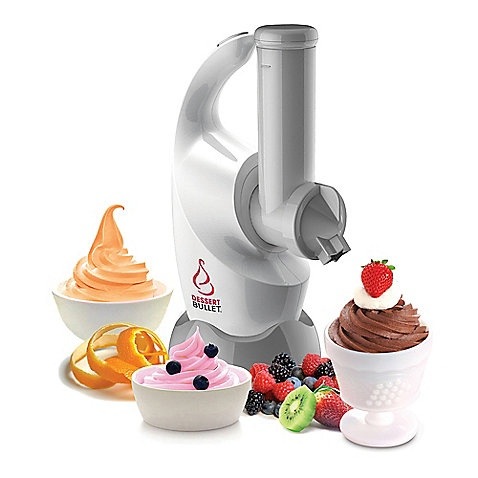
Two words: Dessert Bullet. I am a happy camper. I bought the Dessert Bullet from a store with a customer satisfaction guarantee, that way if I didn’t like it, I could return it no questions asked. The Dessert Bullet is a masterpiece that turns frozen fruit in iced creamy goodness. Literally, you put in frozen fruit pieces like banana, berries, cherries with other fun ingredients like cocoa powder, vanilla, and mint extract and out comes yummy goodness.

The Dessert Bullet comes with a booklet full of healthy recipes that I have been enjoying tremendously. When I say healthy, I mean they are based with frozen fruit so no sweeteners are required, making desserts without the sugar and calories of regular ice cream. Even my diabetic husband can have some!

The recipes vary from Mint Chocolate Chip, Cookies and Cream, to Orange Dreamsicle and Creamy Berry Sorbet. The last one I tried was “New-Fashioned Chocolate”, made with a frozen banana, cocoa and vanilla. It is by far the best substitute for chocolate ice cream. And it’s healthy! 🙂 I can’t wait to try the Strawberry Bon-Bon.

I give the Dessert Bullet five stars!

Finally, I Can Glow Naturally! Thank You Coconut Oil!

In an older post, I revealed some rather personal information about my “glowing” underarms. I reviewed the Secret Natural Mineral Antiperspirant, which must have been the millionth brand I had tried. Every time I dared something “natural”, it ended up either working for about an hour, or not being natural at all. Well, the search is over! I can officially glow naturally!

About six or seven months ago, I can across a home-made recipe for deodorant/antiperspirant. Huh. Yeah, right. As if home-made would ever work, right? I had started consuming coconut oil a few months before for all kinds of uses – cooking, skin rashes, as an antifungal for my dog’s skin, etc. This recipe I found was primarily made of coconut oil. “Why not give it a try?” I asked myself, since I admired coconut oil’s properties so much. So, I did.

The first week, I always made sure I had a back-up antiperspirant in my purse in case. I, not once, had to reapply any deodorant. I put on the DIY coconut deodorant in the morning after my shower and was fine until the next morning. I was flabbergasted! No more aluminum and other fake stuff I don’t know about, and no more sticky film! I now recommend it to everyone I know.

First, here is the link to the recipe on The Prairie Homestead: http://www.theprairiehomestead.com/2012/12/diy-coconut-oil-deodorant.html.

And here is the recipe (thank you, thank you, thank you Jill Winger for posting this!):
1/3 cup of coconut oil
1/4 cup baking soda
1/4 cup arrowroot powder
4 tbsp. cornstarch
essential oils

The Prairie Homestead site has more info on the preparation, I suggest you visit it directly.

Both times I did this recipe, I used Tea Tree, Lemon and Grapefruit essential oils – they all have antibacterial properties. My first batch, which lasted close to six months, I used coconut oil that tastes and smells like coconut. No matter how much essential oil I put in there, I always had the coconut smell, which is not a bad thing, I guess. I switched it up to non-tasting coconut oil for my second batch, now it smells like fresh citrus. 🙂

A word of caution: make sure you use essential oils that can be applied to the skin, “fragrance oils” are not essential oil so avoid those. I found a great article you should read if you are new to essential oils: 21 Things You Should Know About Essential Oils

I am never, ever going back to store bought antiperspirant. Ever.

Final score: 5 out of 5

Raw Honey – To Eat or Not to Eat?

My family and I have been eating “healthy” for quite a while now. We seek out good quality, natural substitutes for things like vegetable oil and sugar. There is a tone of information out there to help us make healthy choices, but really, what is truly “healthy” for me? One source will tell me butter is bad for me, but another source says it’s good. How can one make healthy choices in such a confusing world? It boils down to gaining as much knowledge as possible about foods and knowing myself and my body inside out. What my diet consists of, my body constitution, my mood, all of it will guide me toward judging whether or not butter, or any other food, is healthy for me.

I recently decided to try raw honey. I had been reading about how much more healthy it is than regular honey, with many of its beneficial properties not being stripped out by pasteurization. I first bought a small bottle; it is expensive and I was just trying it out. Every morning for about a week in the month of June, my kids would make themselves toast with raw honey for breakfast. I was adding raw honey to my plain yogurt with hemp seeds and berries. It was absolutely delicious! My kids loved it, I loved it! You can taste the more “natural” side of raw honey. It’s just got more flavor. I was thinking I was sold… until I could hardly see my son’s eyes anymore.

As the days were going by, my son and I were both experiencing more and more seasonal allergies. We both have them every spring and fall, but nothing serious, just enough to be annoying. I wasn’t thinking anything of it as it was about that time of year. This time, I was getting allergy-type sinus headaches that would get worse in the afternoons, on top of sore throat and difficulty breathing. My son’s symptoms were the same, plus his eyes got so swollen, itchy and watery that he could hardly see anymore. We were both taking allergy medicine (the homeopathic kind that is usually very effective), but nothing seemed to relieve our symptoms. This was very unusual. After over a week of trying to figure out why we were getting severe allergies, a light bulb suddenly turned on above my head. The raw honey!!!

The honey pasteurization process removes any trace of pollen, among other things like (healthy and non-healthy) bacteria, from the honey. Raw honey is not pasteurized like the regular honey we know. So, the raw honey we were eating most likely contained pollen from plants and flowers to which my son and I are allergic. The danger in this case was that we were not breathing in the allergens, we were consuming them directly in our bodies allowing them to be transported in our blood stream. Needless to say, I immediately ordered my kids to stop eating the raw honey and got rid of the 3/4 empty bottle. Within a few days, our symptoms were gone. This could have been disastrous if our allergies were extreme to begin with.

My recommendation: raw honey is great for you if you don’t have any seasonal allergies (like my daughter who was fine that whole week, but I’m still not taking any chances), or if your immune system is not vulnerable to the wrong kinds of bacteria.

Final score: I can’t give raw honey a score in this case, because it all depends on circumstances.

Nintendo Customer Service

We’ve had our Nintendo Wii for quite a few years now and had never encountered any issues with it. We were pretty pleased, until last month – when my son and hubby started playing Call of Duty: Modern Warfare. They played for a few weeks until the Wii just could not take it anymore. I guess you could compare the experience with a couch potato who starts having sex three times a day with an olympic athlete – the heart can only take it for so long, until you upgrade it.

Since our warranty expired a long time ago, we had to find a place to fix it, or get a new one. We looked around at local places who could potentially repair it, but they either charge too much (almost the same price as getting one brand spanking new) or were just plain creepy. So, my hubby turned to Nintendo directly, expecting the price to be just as high and a wait time of 6 to 8 weeks or something. The customer representative (that’s at the Nintendo Canada office in Montreal) was very delightful and told my husband that it cost $95 including shipping. That’s not bad, considering they send you a new Wii if they can’t fix yours. We were also told it would be about 10 business days –  much better than the time we originally expected.

My husband packed up the heart broken Wii and sent it off on a Tuesday afternoon. The Thursday of the same week, we get a package from Nintendo! Yes! In 2 days, our Wii was shipped to Montreal, fixed and shipped back (and it was ours, not another refurbished one)!!! 2 DAYS! And it’s working like that couch potato on an overdose of Viagra.

Kudos to Nintendo (Canada) for the excellent service!

Final score: 5 out of 5

Best Homemade Granola Bars Recipe!

I’ve finally found the perfect homemade granola bar recipe! I have two kids in elementary school; they can’t bring any food item with nuts or that might have come in contact with nuts. Have you ever looked for granola bars without nuts? There are very little choices. Not that they get granola bars every day, but we call it the “you’ve eaten everything in your lunch and you’re still hungry” snack. However, when you’re in fifth grade and you’ve seen the same 3 flavours of granola bars for the past 5 years, you kind of get annoyed.

Here’s a recipe that was forwarded to me by a colleague. We have no idea who or what the source is, sorry. It’s VERY easy, and flexible. You can put in whatever your heart desires in them. 

3 cups of oatmeal (the regular kind, not quick cooking)
3 cups of whatever you want in your bars (e.g. dried cranberries, raisins, sunflower seeds, etc.)
1/2 cup of canola oil
1 can sweetened condensed milk (e.g. Eagle Brand)

Mix everything and spread on a baking sheet lined with parchment paper. Bake at 350F for 30 minutes. Let cool, remove from baking pan, let cool some more. When completely cooled, cut into whatever size or shape you like.

If you want, you can wrap each piece individually in plastic wrap and store in a freezer bag in the freezer. You can just pull one out when you are making lunches and it will be thawed for snack time!

I made two batches last week; both are just as good. In my first batch, I put in: raisins, cherry infused dried cranberries, pomegranate infused dried cranberries, pumpkin seeds, hemp seeds and a little All Bran cereal for fibre. In my second batch, I put in: mini chocolate chips, Skor bits, raisins and hemp seeds. My kids LOVE them and so do I! I am never buying granola bars again.

Final score: 5 out of 5